





The five levels of a run
Hide & Seek is a run of five levels. Each one asks for a set number of notebooks, and later levels add new rooms, structures and dangers.
| Level | Type | Notebooks | Time limit |
|---|---|---|---|
| 1 | School | 4 | 5 minutes |
| 2 | School | 7 | 7 minutes |
| 3 | School | 9 | 9 minutes |
| 4 | Maintenance, Factory or Laboratory | 7 | Shown at the elevators |
| 5 | Maintenance, Factory or Laboratory | 9 | Shown at the elevators |
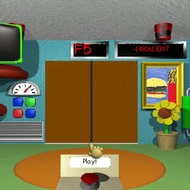
The notebook counts are fixed, with one exception: if too few classrooms generate to hold all of them, the level asks for fewer. The time limit is also shown on a timer at the elevators, so you can always check how long you have left.
Level types
The first three levels are always the school. Levels 4 and 5 use one of three special types, and the same type never appears twice in one run. A chalkboard in the Pitstop shows which type comes next.
| Type | Main idea | Key structures |
|---|---|---|
| Maintenance | Stealth and power | Power levers, a breaker, steam valves, the lightbulb testing room |
| Factory | Changing pathways | Lockdown doors, roto-halls, conveyor belts, the crane room |
| Laboratory | Teleportation | Four sections, teleporters, faculty-only doors, the wormhole room |
What changes from level to level
- More elevators. Later levels have several elevators. Each one you reach goes out of order, and only the last one takes you out.
- Vents. On level 3, vent entrances in some rooms pull anyone who steps in through the ducts to an exit elsewhere on the level.
- Later-level structures early. Levels 2 and 3 can generate structures that mostly belong to later levels, so you learn them before they matter.
- Locked rooms. Rooms with a shaped lock hold valuable items, and the one on level 2 always holds the Bus Pass.
- A faster Baldi. Every level has its own speed curve for Baldi, and on level 4 it ramps up more aggressively than before.
Random events
Each level can throw random events at you. The school bell rings before one starts, and Baldi announces it on the TV screen in your HUD. Some events help you, like the Party that pulls characters to the Principal’s office, while others, like Fog or a Flood, make every hallway more dangerous. The selection of events depends on the seed, but since version 0.6 their order and timing vary on every attempt.
The field trip
Before level 3 the Pitstop has a bus. Bring the Bus Pass from level 2 and click the bus door to go camping. Winning one of the two minigames there spawns eight items, and you can take up to three into the rest of the run.
Reading the map
The map is your best tool on every level type. Rooms are color-coded by danger: classrooms are green and faculty rooms are red, and icons mark room types, locked doors and open elevators. On the advanced map you can place markers, and since version 0.10 push pins can be placed in pairs to mark connections, such as where a vent leads or which button controls which door. In the Laboratory, sections have numbered posters, and teleporter rooms show their numbers on the map.
When the time runs out
Every level type has the same school closing rules. Once the timer hits zero, the hall lights go out one by one, Baldi keeps getting faster and the Principal of the Thing chases you just for being in the halls after hours. It is the main reason to leave as soon as your notebooks are collected.
Standing on a cell that is as dark as possible hides you from other characters. After hours, the dark halls can work in your favor if you know where you are going.
If you are still learning the basics of a level, start with the Beginner Guide, then come back here to prepare for the later floors.