







Beginner Guide
Baldi’s Basics Plus looks like a silly 90s edutainment game, but it plays like a stealth roguelike: the school is generated anew for every run, Baldi follows every sound you make, and one careless sprint in front of the Principal can cost you the run. This guide explains the rules of a run, what to do in your first minutes and the habits that help beginners reach the later levels.
The goal of a run
The main mode is Hide & Seek. You play five randomly generated levels in a row, and each level works the same way:
- Collect the required number of notebooks. Later levels ask for more of them.
- When the last notebook is in your hands, the elevators open and light up green.
- Reach the elevators and press the button inside to leave the level.
If Baldi catches you, you lose a life (lives are shown as green power tubes). You return to the Pitstop, your inventory and storage locker go back to how they were, and the level starts again. Lose all lives and the run is over.
How many lives you get depends on the play style you choose in the Hide & Seek menu:
| Play style | Lives | Who it is for |
|---|---|---|
| Normal | Three power tubes at the start of every level | Your first runs |
| Arcade | Three at the start, no new ones between levels | Players who can clear levels without dying |
| Strict | One power tube for the whole run | A real test of skill |
| Explorer | Baldi disappears after his countdown | Learning levels, rooms and mechanics in peace |
Before your first real run, play the tutorial from the mode select screen. Its chalkboards show your current key bindings, so it is also the easiest way to learn the controls.
Controls
These are the default keyboard and mouse controls. You can change them in Options, and since version 0.14.2 every save file keeps its own control map.
| Action | Default |
|---|---|
| Move | W A S D |
| Run | Left Shift |
| Look back | Space |
| Interact (doors, notebooks, machines) | Left mouse button |
| Use the selected item | Right mouse button |
| Choose an item | Mouse wheel or 1–5 |
| Quick map / advanced map | Tab / M |
| Pause | Esc |
Your first minute
- Meet Baldi at the elevator. As soon as you walk away from the starting elevator (or hide in a blue locker), he covers his eyes and counts down from 10. Use these seconds to get out of his sight.
- Open the map. The quick map shows what you have already explored; the advanced map lets you place markers. Classrooms are green, faculty rooms are red.
- Walk, don’t run. Running in the halls is against the rules, and you will need your stamina later when Baldi is behind you.
- Head for the nearest classroom. Notebooks are in classrooms, and on later levels many of them are locked behind a short activity.
Notebooks and activities
Every notebook you collect makes Baldi a little faster, and so does every activity you fail. That is why it pays to slow down and solve activities carefully. Completing an activity also gives you stamina back.
| Activity | How to solve it |
|---|---|
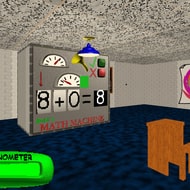
| Math Machine | Solve the problem on the machine using the number balloons in the room |
| Balloon Buster | Pop balloons until only the number shown on the device is left, then pull the pulley to submit |
| Match Machine | Find matching pairs of object balloons. Since version 0.14 you need three matches, and the last pair reveals itself |
Activity classrooms have a chalkboard that explains how to solve them, so read it before you start. In Maintenance levels a classroom must have power before its activity can be solved. A neon BONUS sign under a classroom sign means a bonus question is available: answer it for extra YTPs.
A wrong answer or a failed activity makes Baldi faster and tells him where you are. If you are not sure, take a moment to read the problem again instead of guessing.
How Baldi finds you
Baldi does not know where you are. He reacts to what he sees and hears:
- Sound. Doors, lockers, wrong answers and other noises tell him where to go. The Baldicator icon in the corner of the screen shows when he is heading towards a sound.
- Sight. If he sees you, he comes straight at you. He sees through yellow swinging doors, but not through intact windows.
- Lockers are not a bunker. If he hears you in a blue locker, he pulls you out.
You can use this against him: open a door or a locker and walk away in the opposite direction. Baldi goes to check the noise, and you get time to work.
Every door you open is a sound Baldi can follow. If you need to get through quietly, wait for another character to open the door for you, or use the WD-NoSquee to silence it.
School rules
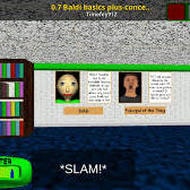
Baldi ends the run, but the Principal of the Thing can waste a lot of your time. If he sees you breaking a rule, he sends you to detention in his office, and the noise attracts Baldi there. Every new detention lasts longer than the last one.
| Rule | How to stay out of trouble |
|---|---|
| No running in the halls | Look around before you run, even a short sprint counts |
| No drinking in the halls | Drink a BSODA where the Principal can’t see you |
| No entering faculty rooms | Leave faculty rooms only when he is out of sight |
| No looking in other people’s lockers | Don’t climb out of a blue locker in front of him |
| No escaping detention | Wait out the timer or use an item that gets you out unseen |
| No being at school after hours | Finish the level before the time runs out |
Stamina
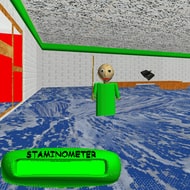
Running uses stamina, and an empty bar means you walk at normal speed exactly when you need to escape. You get stamina back by completing activities, drinking from water fountains (since version 0.14 every classroom on level 1 has one) and with items such as the Zesty Bar. Save sprints for emergencies, not for crossing an empty hallway.
The time limit
Every level has a timer, which is also shown at the elevators. On the first three levels it is 5, 7 and 9 minutes. When it runs out, the school starts closing: the hall lights go off one by one, Baldi gets faster over time, and the Principal punishes you just for being in the halls after hours. The time limit is the main reason not to wander around once your notebooks are collected.
Leaving through the elevator
On later levels there are several elevators. Since version 0.14, every elevator has a button inside, and pressing it counts as reaching that elevator: it goes out of order, and you head for the next one. In the last elevator, the button takes you out of the level. The map helps here: open elevators are marked with an arrow that turns green.
With the Elevator Gears sticker you can leave through an elevator before all the others are out of order. It is one of the stickers worth hoping for when you open sticker packs.
The Pitstop and Johnny’s Store
Between levels you arrive at the Pitstop. A chalkboard there shows the type of the next level, so you know what to prepare for. Here you can:
- Shop at Johnny’s Store. Buy items, a map of the next level and sticker packs with YTPs. Once per run, Johnny can lend you up to 100 YTPs towards an item.
- Use the storage locker. It holds up to three items and keeps them between levels.
- Apply stickers. Up to four stickers fit on the back of your You Can Think Pad. Each gives a bonus, for example an extra inventory slot or 25% more YTPs, and lasts until you clear the level unless you use a Glue Stick.
- Save and quit. The run continues from here next time.
Before level 3 the Pitstop also has a bus to a field trip. You need the Bus Pass, which you find on level 2: winning a field trip minigame gives you items to choose from and YTPs.
How to earn YTPs
You Thought Points are the currency of the game, and a good haul before level 3 makes the later levels much easier. The main sources:
- bonus questions in classrooms;
- returning lost items to students (the reward grows with every student you help);
- YTP pickups lying around the level;
- passing Dr. Reflex’s test and going to Mrs. Pomp’s class quickly;
- field trip minigames.
Beginner mistakes
- Running everywhere. It brings the Principal and leaves you with no stamina for the chase.
- Guessing in activities. A failed activity makes Baldi faster and noisily shows him where you are.
- Ignoring faculty rooms. They often hide YTPs and good items, just watch out for the Principal when you leave.
- Spending everything on level 1. Items and stickers are worth more on the harder levels.
- Hiding in a locker too long. If Baldi heard you get in, he will pull you out.
- Forgetting the timer. After hours, the school becomes far more dangerous.
Checklist before a run
- Sound is on: you hear Baldi’s ruler and the doors before you see anything.
- You know your controls, including look back and the map.
- The play style is Normal for your first runs.
- You have played the tutorial at least once.
- You know the six school rules.
- You plan to save YTPs for levels 3 to 5.
FAQ
How many levels does Hide & Seek have?
Five. The first three are always the school; levels 4 and 5 can be a Maintenance, Factory or Laboratory level, and the same type does not repeat in one run.
What happens when Baldi catches me?
You lose a power tube, return to the Pitstop and replay the level from the start. Your inventory and storage locker go back to how they were. If you have no power tubes left, the run is over.
Can I save in the middle of a run?
Yes, at the Save & Quit spot in the Pitstop between levels. Since version 0.14.3, quitting from the pause menu while in the Pitstop also saves the game. Explorer play style can’t be saved.
Is there a tutorial?
Yes. The tutorial button is on the mode select screen, and Baldi explains the basics there himself.
